How to Plan Lighting on a Budget: The Definitive Editorial Guide
How to plan lighting on a budget the architectural identity of a space is fundamentally determined by the manipulation of photons, yet the financial barriers to professional-grade illumination often deter the average property owner. Lighting is frequently the last item in a renovation budget, often reduced to a few “builder-grade” ceiling fixtures once the more tangible costs of flooring and cabinetry have been reconciled. However, the quality of a living environment is not necessarily correlated with the price of the decorative housing; it is a product of the strategic distribution of light and the understanding of human visual perception.
Planning an effective lighting scheme on a restricted budget requires a shift from a “fixture-centric” mindset to an “effect-centric” one. Instead of selecting expensive chandeliers that serve as static centerpieces, the goal is to master the layering of light—ambient, task, and accent—using versatile and cost-effective components. This approach demands a forensic look at the building’s existing assets, such as natural light sources and reflective surfaces, to minimize the need for high-wattage, high-cost electrical installations.
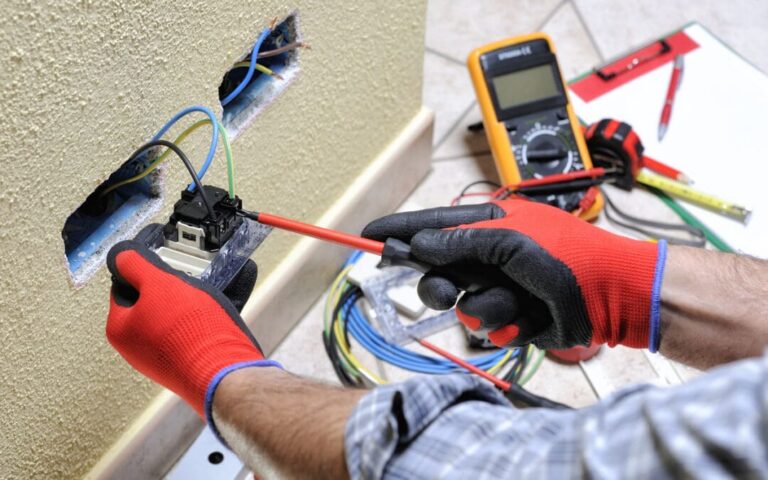
In the contemporary American market, the democratization of LED technology has significantly lowered the entry price for high-CRI (Color Rendering Index) lighting and smart control systems. However, this accessibility has also created a landscape of low-quality consumer goods that fail prematurely. To navigate this successfully, one must understand where to allocate capital for durability and where to utilize “optical sleight of hand” to achieve luxury results. This article serves as a definitive exploration of the technical strategies and systemic frameworks required to execute a high-performance lighting plan without a high-performance price tag.
Table of Contents
ToggleUnderstanding “how to plan lighting on a budget”
The core inquiry of how to plan lighting on a budget is often misconstrued as a search for the cheapest products available at big-box retailers. In reality, budget-conscious planning is an exercise in “Efficiency of Intent.” It involves identifying the specific visual needs of a room and meeting them with surgical precision rather than flooding the space with unnecessary light. If a kitchen is lit with six high-wattage recessed cans, the energy and hardware costs are high, but the visual quality may still be low due to harsh shadows. A budget plan would instead prioritize a few well-placed task lights under the cabinets and a single ambient source, achieving superior utility for a fraction of the hardware cost.
Oversimplification in budget planning often leads to “Symmetry Bias”—the belief that lights must be placed in a perfect grid on the ceiling. This is one of the most expensive mistakes in residential design, as it requires excessive wiring and fixtures to light empty floor space. A professional budget strategy utilizes “Asymmetric Logic,” placing light only where it is needed: on a work surface, a piece of art, or a transition point. By reducing the number of “points of light,” one can afford higher-quality fixtures for the locations that truly matter.
Furthermore, the “budget” in this context must be viewed through the lens of Total Cost of Ownership (TCO). A $10 bulb that lasts 25,000 hours is infinitely cheaper than a $2 bulb that lasts 1,000 hours, especially when considering the labor or time required for replacement. Planning on a budget therefore requires a technical understanding of “Lumen Maintenance” and “Driver Reliability”—ensuring that the low-cost components chosen today do not become a recurring expense tomorrow.
Historical and Systemic Evolution of Budget-Conscious Lighting
How to plan lighting on a budget the history of lighting for the masses was defined by the limitations of the incandescent bulb. For nearly a century, budget lighting meant using a single, high-wattage central fixture that created “Glaring Uniformity.” These systems were inefficient, producing more heat than light, and offered no flexibility for different times of day. The “Low-Voltage Revolution” of the 1990s introduced halogen track lighting, which allowed for better aiming but remained expensive to operate and difficult to dim smoothly without specialized equipment.
The current “Solid-State Era” has fundamentally changed the economics of the industry. Because LEDs are electronic components rather than gas-filled glass tubes, they can be miniaturized and integrated into diverse materials. This has led to the rise of “Tape Lighting” and “Puck Lights,” which allow for sophisticated layering at a tenth of the cost of traditional architectural fixtures. We have evolved from a period of “Bulb Scarcity” to one of “Digital Abundance,” where the primary challenge is no longer the cost of the light itself, but the cost of the controls and the strategy used to deploy it.
Conceptual Frameworks and Mental Models How To Plan Lighting On a Budget
To master budget lighting, one must adopt mental models that prioritize visual impact over hardware volume.
1. The “Negative Space” Model
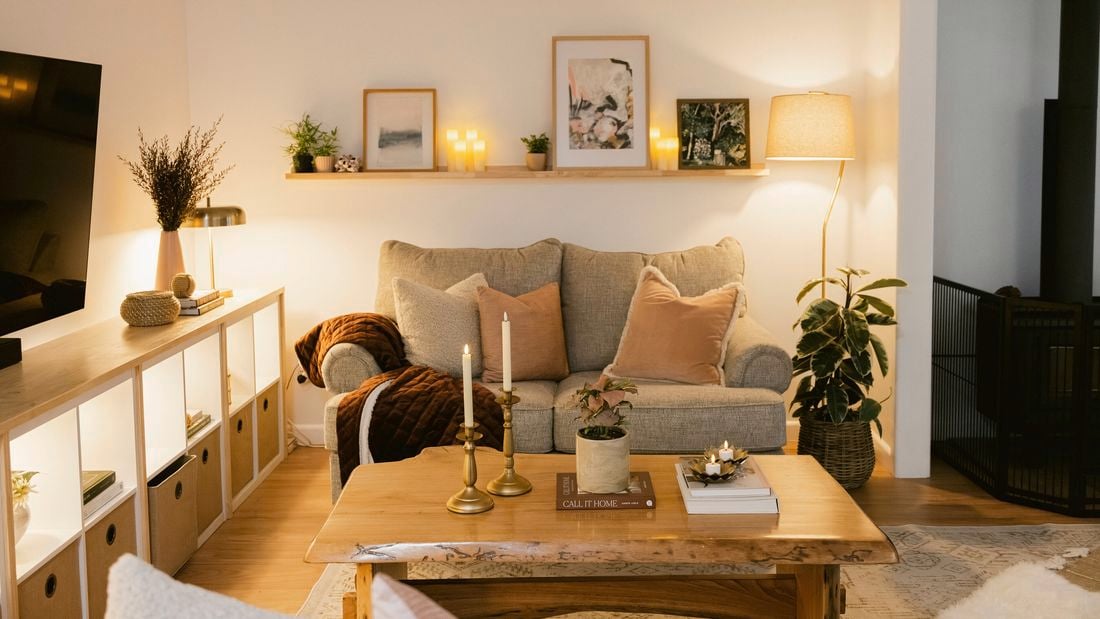
Just as a painter uses shadows to define form, a lighting designer uses darkness to define space. In a budget context, you do not need to light the entire room; you only need to light the “intersections of activity.” By leaving corners or secondary areas in soft shadow, you create a sense of depth and luxury that uniform lighting cannot achieve. This reduces the number of fixtures required by 30-50%.
2. The “Reflective Multiplier” Framework
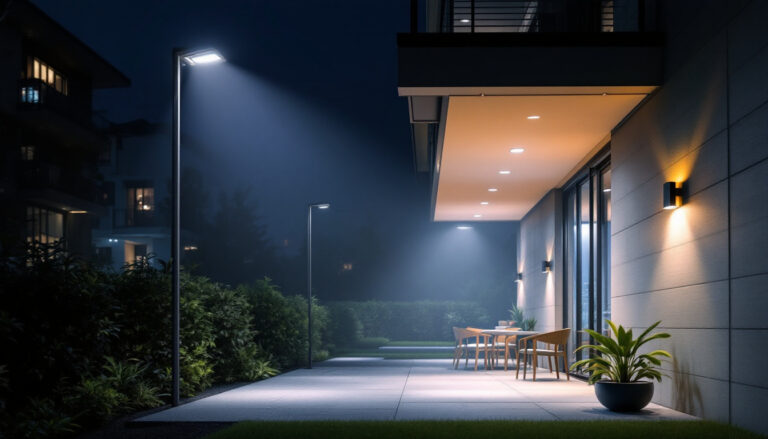
Light is only visible when it hits a surface. Instead of buying more lights, a budget plan focuses on “Wall Washing.” By aiming a light at a white or light-colored wall, the entire surface becomes a giant reflector, providing soft, ambient light for the whole room. One $40 spotlight aimed at a wall is often more effective than four $20 downlights embedded in the ceiling.
3. The “Tactile vs. Atmospheric” Split
This model dictates where to spend your money. If the user touches the fixture (a desk lamp or a dimmer switch), invest in high-quality materials. If the fixture is hidden (under-cabinet tape or a recessed can), prioritize the quality of the light engine (CRI and flicker rate) over the aesthetic of the housing.
Key Categories of Low-Cost Illumination and Technical Variations
Achieving a high-end look on a budget involves leveraging modern categories of light that offer high “Visual ROI.”
| Category | Primary Benefit | Cost Profile | Trade-off |
| LED Tape Light | Invisible layering | Low ($1–$3/ft) | Requires careful heat dissipation (aluminum channels). |
| Plug-in Pendants | No electrician needed | Moderate | Visible cords must be styled intentionally. |
| Battery-Op Sconces | Zero wiring cost | Low ($20–$50) | Requires regular charging/battery replacement. |
| Track Lighting | Extreme flexibility | Moderate | Can look “commercial” if not aimed correctly. |
| Smart Bulbs | Built-in dimming | Low ($10–$25) | Dependent on stable Wi-Fi/Hub. |
| Uplighting (Floor) | Dramatic depth | Very Low ($15) | Can create glare if not shielded by furniture. |
The decision logic here often relies on “Installation Friction.” If the cost of an electrician to run a new wire is $200, but a plug-in pendant costs $60, the plug-in option is the superior budget choice even if the fixture itself is slightly more expensive.
Detailed Real-World Scenarios How To Plan Lighting On a Budget and Decision Logic
The Rental Apartment Kitchen
The kitchen has a single, harsh fluorescent ceiling light and dark countertops.
-
The Decision: Avoid replacing the ceiling fixture. Instead, install “Warm-White” LED tape under the upper cabinets using a simple plug-in transformer.
-
The Constraint: No permanent modifications allowed.
-
Result: High-quality task light that makes the kitchen feel modern and functional for less than $100.
The Dark Living Room with No Overhead Light
A large room with only one floor lamp in the corner.
-
The Failure Mode: Buying three more mismatched floor lamps, cluttering the floor space.
-
The Mitigation: Place two $15 “can lights” on the floor behind large plants or furniture, aimed at the ceiling.
-
Result: The ceiling becomes a soft, glowing light source, making the entire room feel larger and more inviting without any electrical work.
Planning, Cost, and Resource Dynamics How To Plan Lighting On a Budget
The economic profile of how to plan lighting on a budget is defined by the “Value-to-Labor” ratio.
| Component | Standard Entry Price | “Budget Pro” Strategy | Savings % |
| Recessed Lighting | $150 (inc. labor) | Surface-mount “Disk” lights | 60% |
| Dimmer Switches | $40 (Smart/WiFi) | Traditional Slide Dimmers | 50% |
| Under-cabinet | $300 (Hardwired) | DIY LED Tape Kits | 80% |
| Chandelier | $500+ (Designer) | Second-hand + High-CRI Bulbs | 70% |
The “Opportunity Cost” of a poor budget plan is “Visual Flatness.” If you spend your entire budget on one expensive pendant but have no dimmers or accent lights, the room will feel “cheap” despite the expensive centerpiece. A balanced budget allocates 20% to the “Showpiece,” 40% to “Utility/Task,” and 40% to “Controls/Dimmers.”
Tools, Strategies, and Support Systems
-
High-CRI Bulbs (90+): The most effective budget tool. A cheap lamp with a 95 CRI bulb looks better than an expensive lamp with a 70 CRI bulb.
-
Plug-in Dimmers: These allow you to add atmospheric control to any existing floor or table lamp for under $15.
-
Command Strips & Cord Covers: Essential for making “Plug-in” solutions look integrated and permanent.
-
Smartphone Lux Meters: Apps that help you identify “dark spots” to ensure your light placement is mathematically sound.
-
Frosted Glass Spray: A $10 tool to turn a clear, glaring bulb into a soft, diffused light source.
-
Aluminum Channels: Necessary for LED tape to prevent “spotting” and ensure the LEDs don’t overheat and fail.
Risk Landscape and Systemic Failure Modes How To Plan Lighting On a Budget
The primary risk in budget lighting is “Color Temperature Mismatch.” If you use a “Cool White” (5000K) bulb in your ceiling and a “Warm White” (2700K) bulb in your lamp, the room will feel discordant and anxious. A professional budget plan mandates a “Kelvin Standard”—usually 2700K or 3000K—for every single bulb in the space.
Another significant risk is “Flicker and Dimming Incompatibility.” Inexpensive LED bulbs often flicker when used with older dimmer switches. This can cause headaches and eye strain. When planning on a budget, it is critical to verify that the bulb and the dimmer are “Phase-Compatible” (CL or ELV rated).
Governance, Maintenance, and Long-Term Adaptation
A budget lighting system requires a “Consistency Protocol” to maintain its value over time.
The Maintenance Checklist:
-
Monthly: Dusting fixtures. Dust on a bulb can reduce light output by 20% and cause the LED to run hotter, shortening its life.
-
Bi-Annually: Check “Tape Adhesion.” Budget LED tape can sometimes peel; re-securing it early prevents wire fatigue.
-
Annually: “Group Re-lamping.” If one bulb in a multi-bulb fixture fails, replace them all with the same brand/batch to ensure color consistency.
-
As Needed: Paint “Shielding.” If a bare bulb is creating glare, use a small piece of heat-resistant foil or a DIY shade to redirect the light.
Measurement, Tracking, and Evaluation How To Plan Lighting On a Budget
-
The “Squint Test”: If you have to squint when you enter the room, you have too much glare and not enough diffusion.
-
Contrast Evaluation: Ensure the light on your task (e.g., a book) is roughly 3x brighter than the ambient light in the room.
-
Shadow Softness: If your shadows have “hard edges,” you need more diffuse sources or “Wall Washing.”
Common Misconceptions and Oversimplifications
-
“Higher wattage is always better.” Lumens measure light; wattage measures heat and cost. Always look for the highest “Lumens-per-Watt” (LPW).
-
“Smart lighting is only for the rich.” A single smart bulb in an entry lamp is one of the most cost-effective security and comfort upgrades available.
-
“Chandeliers are for ambient light.” Chandeliers are usually “Jewelry.” They look pretty but rarely provide the quality of light needed for a whole room.
-
“Black lampshades look modern.” They also block 90% of the light. On a budget, stick to white or cream shades to maximize the efficiency of your bulbs.
-
“Recessed lights are ‘cleaner’.” They are permanent, expensive to install, and often create “Swiss Cheese” ceilings. Floor-based uplighting is often a cleaner visual solution.
Conclusion
The pursuit of how to plan lighting on a budget is an exercise in intellectual honesty—it is the admission that atmospheric quality is a result of strategy, not spending. By focusing on the “Physics of Comfort”—CRI, Kelvin consistency, and layered distribution—any property owner can achieve a space that feels curated and intentional. The true hallmark of a successful budget plan is its invisibility; when the light is perfect, the viewer doesn’t notice the fixtures, they only notice the beauty of the room they illuminate.