Best Path Lighting for Safety: The Definitive Editorial Guide
Best path lighting for safety the architectural integrity of a landscape is often judged by its daytime presence, yet its functional survival is dictated by its nocturnal utility. Among the various layers of exterior illumination, the navigation of transitions—the walkways, stairs, and changes in grade—represents the most critical intersection of aesthetic design and liability management. To illuminate a path is not merely a task of placing markers in the soil; it is a sophisticated application of optical physics aimed at facilitating safe human movement while mitigating the visual noise of the dark.
The prevailing challenge in modern residential and commercial planning is the paradox of “Over-Illumination.” There is a persistent, systemic belief that higher lumen output directly correlates with increased safety. However, an analysis of human ocular adaptation reveals the opposite: excessive brightness creates high-contrast glare that constricts the pupils, rendering the peripheral “dark zones” virtually invisible. True safety in a landscape is a product of visual uniformity, color rendering, and the elimination of “Hot Spots” that distract the observer from the physical terrain.
As LED technology has matured, the market has become saturated with low-cost, high-output fixtures that promise safety but deliver disorientation. Achieving a professional-grade installation requires a move toward infrastructure-grade materials—solid brass, copper, and precision-engineered optics—that can withstand the corrosive pressures of soil and moisture. This article serves as a definitive exploration of the technical strategies and systemic frameworks required to implement the most effective nocturnal navigation systems, standing as a long-term authority for those who prioritize structural performance over ephemeral convenience.
Understanding “best path lighting for safety”
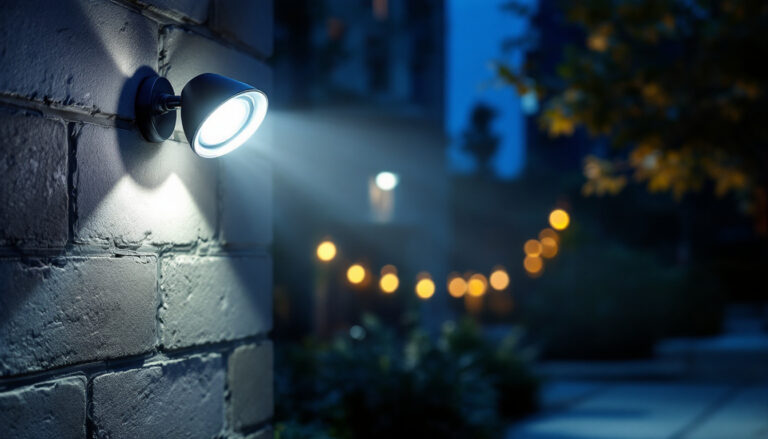
The inquiry into the best path lighting for safety requires a departure from “product-first” thinking toward a “perception-first” model. To a senior editorial designer or an architectural engineer, safety is defined by the reduction of “Visual Friction.” This involves ensuring that the light is directed exclusively onto the walking surface, with zero “Up-light” or side-glare that might blind a pedestrian. A high-tier system utilizes “Full Cut-off” fixtures where the light engine is recessed deeply within a shroud, ensuring the observer sees the illuminated ground but never the light source itself.
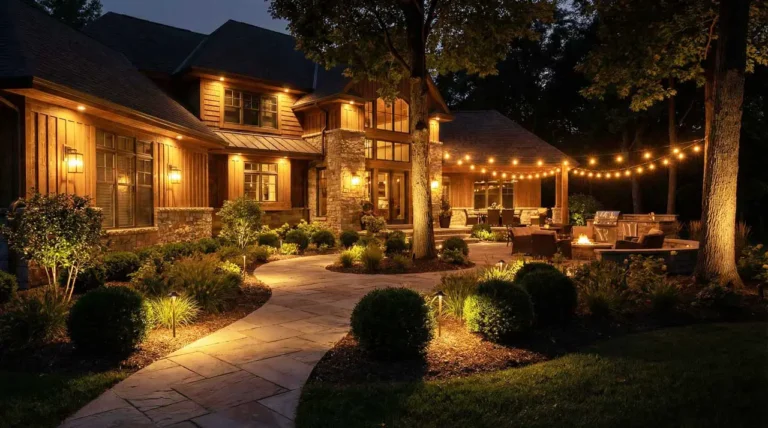
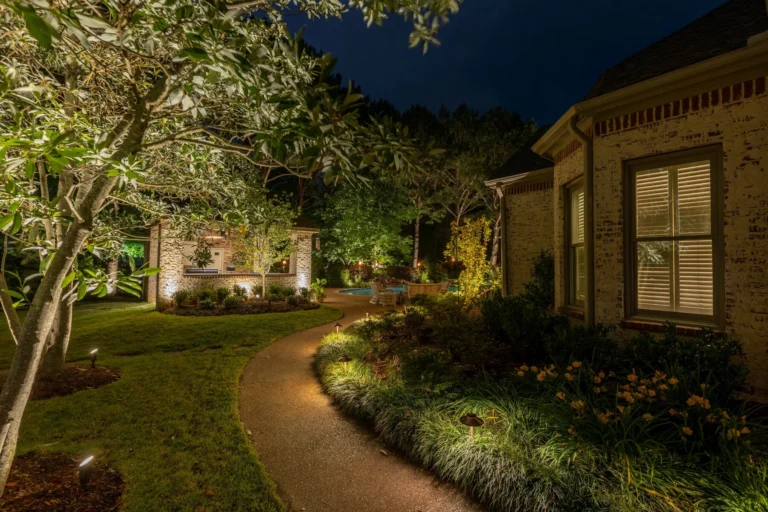
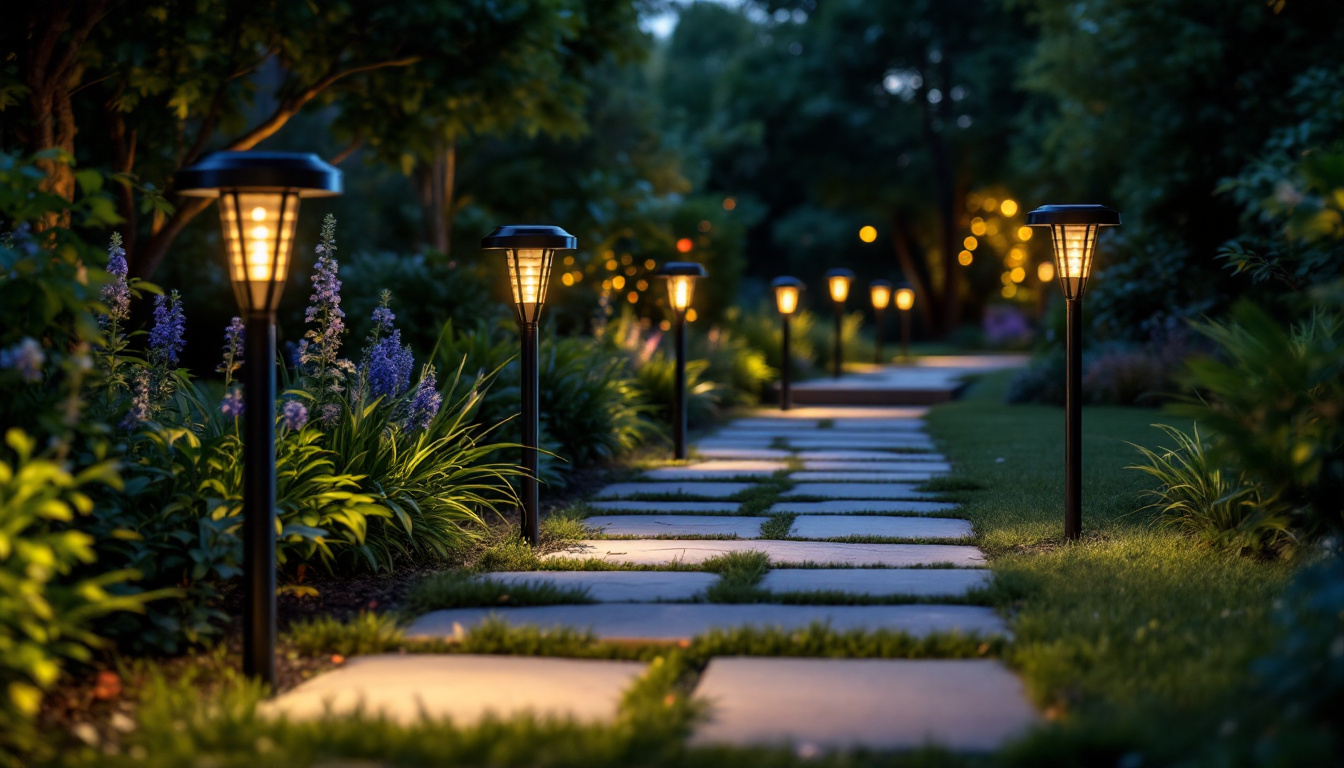
A common misunderstanding in the consumer market is the “Symmetry Bias.” Homeowners often place path lights in a perfectly straight, equidistant line, creating a “Runway Effect.” While this may seem organized, it actually flattens the observer’s depth perception. The most effective safety plans utilize “Staggered Asymmetry,” placing lights at the apex of curves and the base of elevation changes. This strategy provides “Visual Cues” that alert the brain to changes in the environment, rather than lulling it into a repetitive rhythm that ignores subtle hazards.
Oversimplification in this sector often ignores the “Spectral Factor.” The color temperature of a path light (measured in Kelvin) significantly impacts how the human eye perceives obstacles. A 3000K (Warm White) light provides high contrast for typical landscape materials like stone, mulch, and concrete without the harsh, blue-light “scatter” associated with 5000K daylight LEDs. By choosing fixtures with a high Color Rendering Index (CRI 90+), a designer ensures that the subtle textures of a wet leaf or a patch of ice are revealed to the pedestrian, preventing slips and falls that a lower-quality light might obscure.
Deep Contextual Background: The Evolution of Nocturnal Navigation
Best path lighting for safety historically, path lighting was a luxury of the elite, often relying on gas-fed lanterns or torches that required constant manual maintenance. These early systems were characterized by high “Gluttony”—meaning they wasted most of their light into the sky or into the eyes of the walker. The 20th-century introduction of 120V incandescent systems provided more power but introduced significant electrical risks in wet environments.
The “Low-Voltage Revolution” (12V) of the late 1980s was the first major systemic shift toward safety. By stepping down the voltage at a transformer, lighting became safer for DIY installation and for use near irrigation. However, these systems still relied on halogen bulbs, which produced extreme heat and had short lifespans, leading to frequent system failures.
Today, we operate in the “Solid-State Integrated” era. Modern path lighting is no longer a fixture with a bulb; it is a thermal-management device with an integrated LED chip. This has allowed for miniaturization, such as “In-Grade” linear lights that are flush with the pavement, and “Undercap” lights hidden beneath the lip of a stair. The focus has moved from “Illumination” to “Integration,” where the safest systems are those that are virtually invisible during the day.
Conceptual Frameworks and Mental Models Best Path Lighting For Safety
To evaluate the effectiveness of a safety plan, professionals use mental models that reconcile engineering with human behavior.
1. The “Adaptation State” Framework
The human eye takes up to 20 minutes to fully adapt to the dark. This framework dictates that path lighting should be “Dimmed to the Environment.” If the surrounding woods are pitch black, the path lights should be at a lower intensity to prevent the “Black Hole” effect (where the walker cannot see anything outside the small circle of light).
2. The “Leading-Edge” Model
This model suggests that for safety, the light must fall 2–3 feet ahead of the walker’s stride. Lighting the ground directly under a person’s feet is useless for navigation; the brain needs to process the terrain at least one step in advance to adjust the motor response.
3. The “Shadow Management” Protocol
Shadows are as important as light for safety. A perfectly uniform, shadowless path can hide a 1-inch “Trip Hazard” (such as a root or a raised stone). A professional plan utilizes “Grazing” angles that create small, soft shadows behind obstacles, making them stand out through three-dimensional contrast.
Key Categories of Safety Illumination and Technical Trade-offs
Selecting the hardware for a safety system involves balancing aesthetic intent against the mechanical realities of the site.
| Category | Primary Benefit | Safety Risk | Best Use Case |
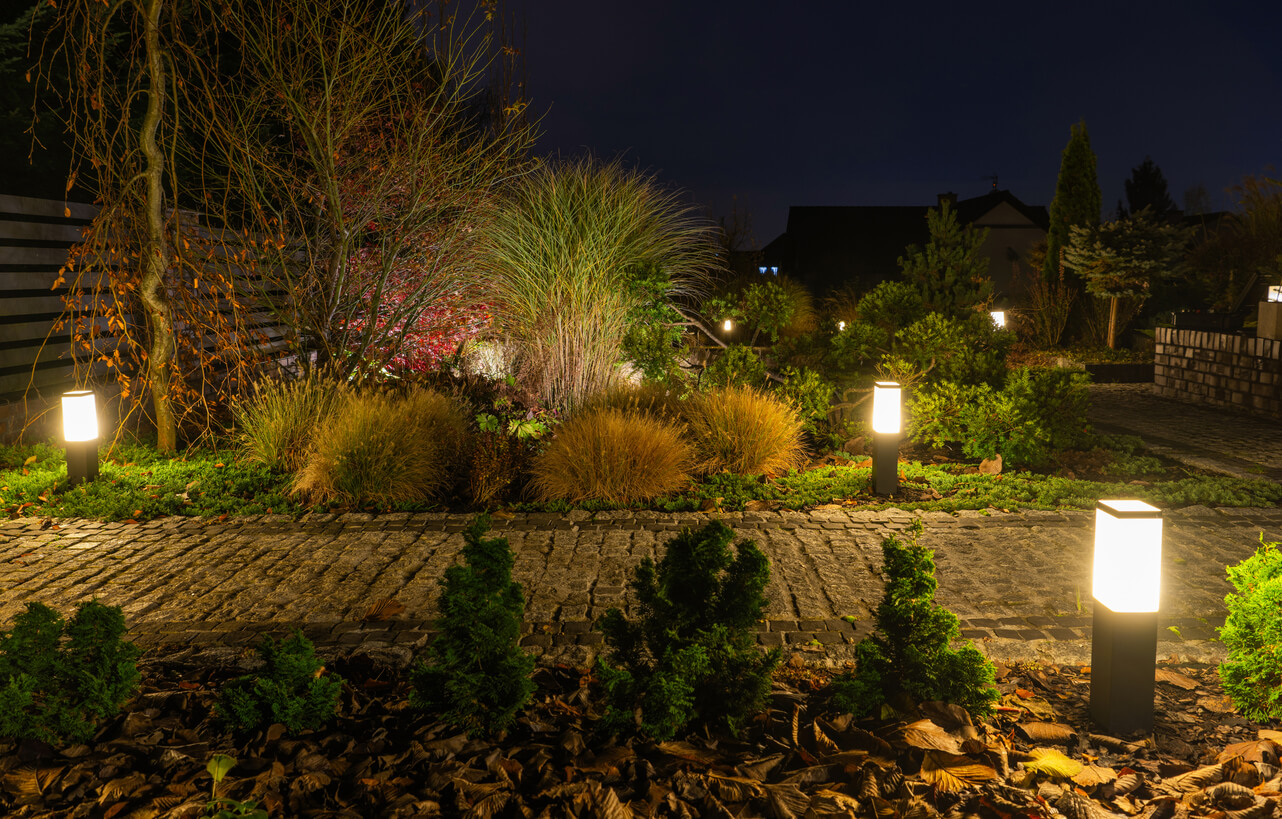
| Bollard Lights | High visibility; architectural presence. | Potential for glare if unshielded. | Wide commercial paths; driveways. |
| Area/Hat Lights | Broad, downward “Pool” of light. | Vulnerable to lawnmowers; “Runway” look. | Garden paths; dense foliage borders. |
| In-Grade (Well) Lights | Invisible during the day. | Can be covered by leaves or snow. | Modern minimalist paths; concrete runs. |
| Step/Undercap Lights | Direct lighting on treads. | Critical failure if one goes out. | Stairs; retaining wall transitions. |
| Moonlighting | Organic, soft ambient glow. | Requires high-up maintenance in trees. | Naturalistic wooded paths. |
The decision logic here often rests on “Infrastructure Permanence.” For a path that will be used daily for decades, an “In-Grade” brass fixture is superior to a “Hat” light because it cannot be knocked over or damaged by children or pets.
Detailed Real-World Scenarios Best Path Lighting For Safety and Decision Logic
Scenario A: The Winding Stone Walkway
A path made of irregular flagstone leads through a dark garden.
-
The Decision: Avoid symmetrical hat lights. Use “Staggered” placement at every 8–10 feet.
-
The Strategy: Place lights in the mulch beds, aimed so the light “washes” over the edge of the stone.
-
Result: The irregular edge of the path is clearly defined, and the texture of the stone provides natural slip-resistance cues.
Scenario B: The Concrete Entry Stairs
Four wide stairs leading to a front porch.
-
The Failure Mode: A single bright porch light overhead.
-
The Mitigation: This creates a “Shadow Trap” on the steps. The correct plan involves “Undercap” lights installed under the lip of every second tread.
-
Result: Each step is defined by a soft line of light, eliminating the risk of over-stepping or missing a tread in the dark.
Planning, Cost, and Resource Dynamics
The economic profile of the best path lighting for safety is defined by the “Material-to-Labor” ratio.
| Component | DIY / Consumer Grade | Professional / Infrastructure |
| Fixture Material | Plastic or Thin Aluminum | Solid Cast Brass or Copper |
| Connector Type | “Pinch” connectors (unsealed) | Heat-shrink, Resin-filled |
| Wire Gauge | 16-gauge (High resistance) | 12-gauge or 10-gauge (Low resistance) |
| Estimated Life | 1–3 Years | 25+ Years |
The “Opportunity Cost” of a cheap safety system is the “Reliability Gap.” If a light fails during a rainstorm when the path is most hazardous, the system has failed its primary mission. Investing in solid brass and sealed connections ensures the system performs when it is needed most.
Tools, Strategies, and Support Systems
-
Digital Voltmeters: Used to ensure “Voltage Balance.” In a safety system, all fixtures should receive between 10V and 15V. If the voltage is too low, the LED will flicker (causing disorientation); if too high, it will burn out.
-
Beam Shapers: Frosted lenses or hex-louvers that can be added to a fixture to soften the light’s edge.
-
Surge Protectors: Installed at the transformer to protect the sensitive LED chips from lightning strikes.
-
Astronomical Timers: These adjust the “On” time daily based on sunset, ensuring the path is never dark before the lights activate.
-
Dimmable Hubs: Allow the owner to set the “Safety Level” higher during a party and lower (for aesthetics) during the late night.
-
Tinned Copper Wire: Essential for preventing “Black Wire Corrosion” in humid or coastal environments.
Risk Landscape and Systemic Failure Modes
The primary risk in path lighting is “Glare Blindness.” This occurs when a fixture is placed too close to a transition (like a stair) and shines directly into the pedestrian’s eyes. This momentarily “bleaches” the retina, making the next 5 feet of the path look like a black void.
Another systemic risk is “Moisture Wicking.” If a wire is nicked during gardening and not repaired with a waterproof seal, moisture will travel inside the copper strands all the way back to the transformer, causing a total system short. A professional plan mandates “Service Loops”—extra wire buried at every fixture—to allow for repairs without digging up the entire path.
Governance, Maintenance, and Long-Term Adaptation
A safety system is a living asset that requires a “Governance Protocol” to maintain its liability-reducing status.
The Maintenance Checklist:
-
Quarterly: Cleaning lenses. Hard water from sprinklers leaves calcium deposits that block light and cause the LED to overheat.
-
Bi-Annually: Re-aiming. Ground settling and plant growth can move a fixture by several inches, turning a safety light into a glare-source.
-
Annually: Testing the transformer’s “Load Balance.” As LEDs age, their power draw can shift slightly.
-
As Needed: Pruning. Foliage should never touch a fixture, as it creates “Optical Blockage” and can trap heat.
Measurement, Tracking, and Evaluation
-
The “Zero-Source” Test: Walk the path. If you can see a “naked” bulb or light chip, the shielding is insufficient.
-
Uniformity Ratio Tracking: Using a light meter to ensure the difference between the brightest and darkest points on the path does not exceed a 6:1 ratio.
-
Leading Indicator: Monthly amperage check. A sudden drop in power draw usually indicates a failing fixture or a cut wire.
Common Misconceptions and Oversimplifications
-
“Solar lights are safe.” Solar lights are “markers,” not “illuminators.” They lack the optics to reveal terrain changes and the battery capacity to last through long winter nights when safety is most critical.
-
“More lights are better.” “Visual Noise” makes it harder to process information. Fewer, perfectly placed lights are safer than many poorly placed ones.
-
“LEDs last forever.” The chip might last 50,000 hours, but the “Driver” (the electronics) often fails in 5,000 hours if not cooled by a high-quality metal housing.
-
“You don’t need lighting if you have a porch light.” Porch lights create deep shadows on steps; safety requires “Low-Level” illumination at the point of the hazard.
-
“Color doesn’t matter for safety.” Blue-rich light (5000K+) creates “Haloing” in older eyes, making it harder for seniors to navigate.
Conclusion
The implementation of the best path lighting for safety is an act of architectural foresight. It is the realization that the quality of the nocturnal experience is governed by the discipline of light control rather than the volume of light production. By prioritizing optical shielding, spectral warmth, and material durability, a property owner can transform a hazardous transition into a secure, inviting landscape. In the high-stakes world of property management and residential design, the most successful system is the one that remains silent and steadfast—providing the clarity of day without the glare of the sun.